You are here
- Home
- Open Access publishing
- Open Research Online (ORO)
- eTheses
- Creating an accessible ethesis
- How to create an accessible table
How to create an accessible table
Any tables included in your eThesis must be accessible. The steps highlighted on this page explain how to create an accessible table in Microsoft Word.
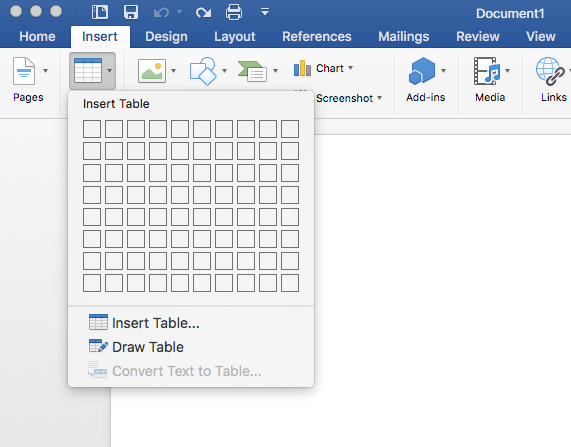
1. In the Ribbon, select Insert tab, then select Table.
2. Select the number of rows and columns by highlighting the boxes on the grid.
3. Type in the table data.
4. Title your table using the caption tool.
- In the Ribbon, select References tab, then select Insert Caption.
- In the popup window, type the title of the table in the Caption textbox.
- In the Label textbox, select Table. Then select OK.
.png)
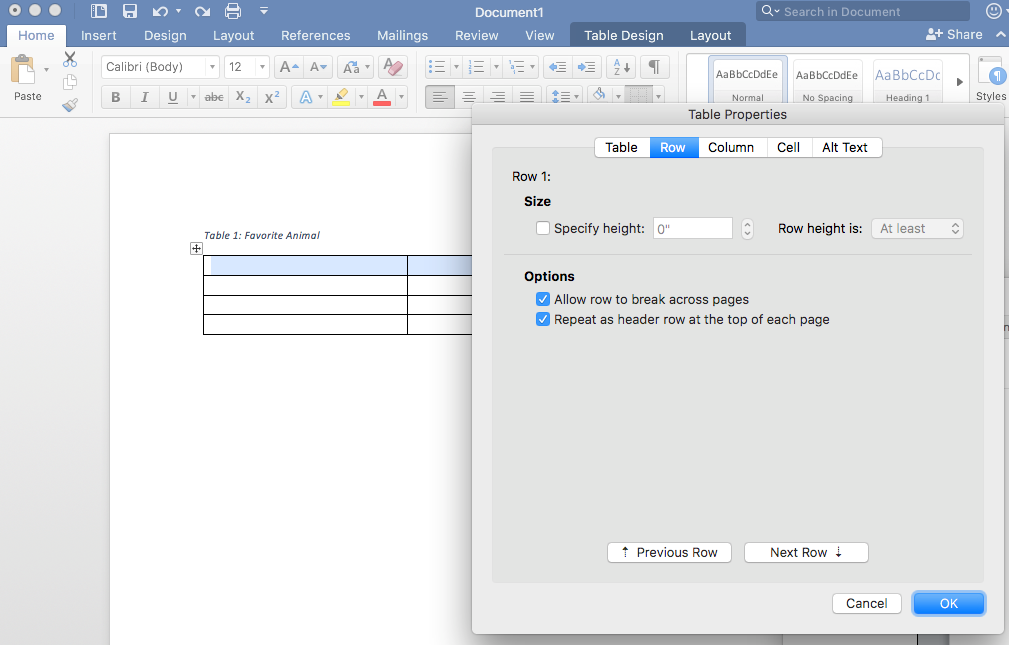
5. Identify the Header Row
- Select the top row of the table and right click.
- Choose Table Properties.
- In the popup window, select the Row Tab and check “Repeat as header row at the top of each page.” Then select OK.
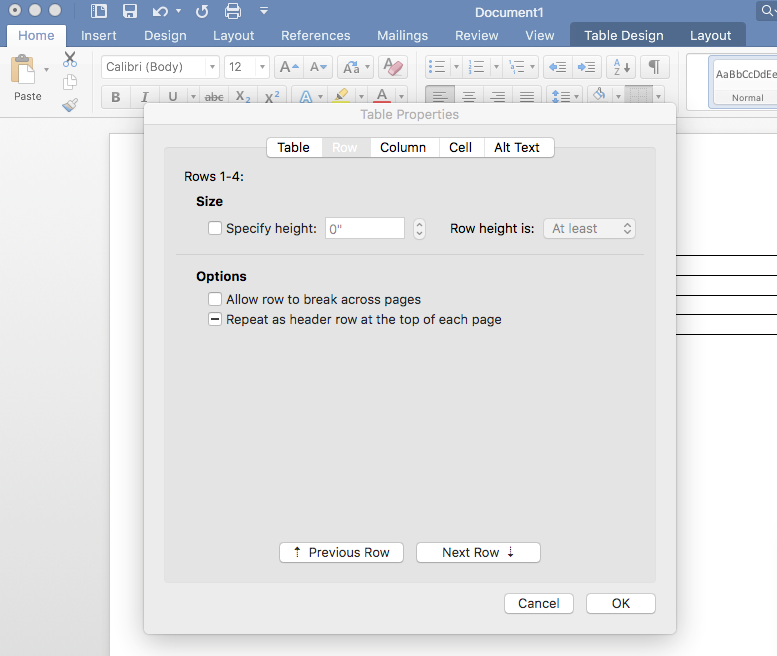
6. Restrict the table to your page width.
- Select the entire table and right click.
- Choose Table Properties.
- In the popup window, select the Row tab and uncheck “Allow rows to break across pages.”
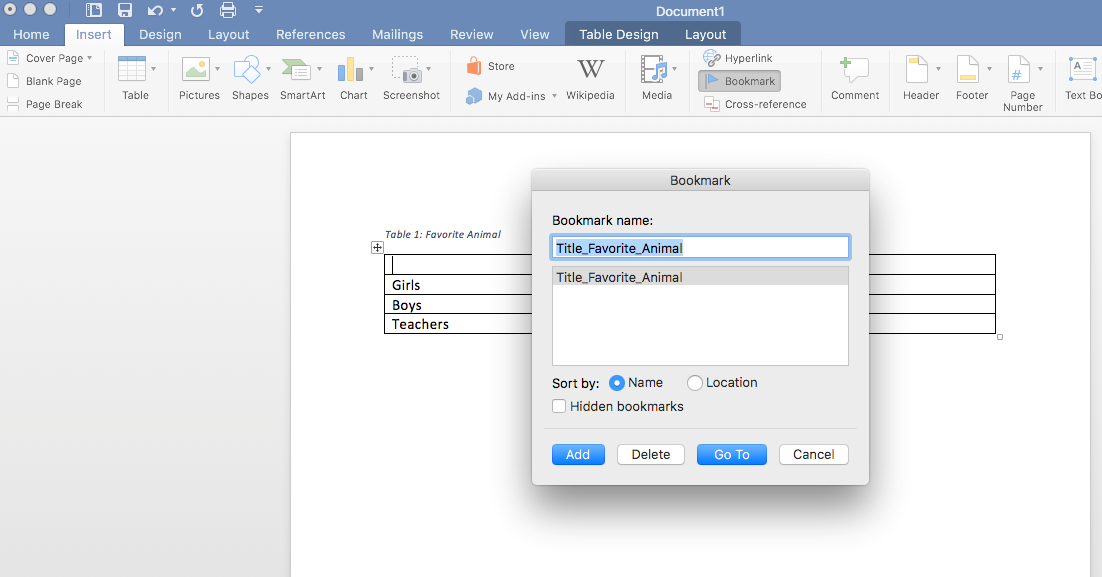
7. Add Bookmark
- Place cursor inside the first cell (A1).
- In the ribbon, select the Insert tab, then select Bookmark.
- In the Bookmark name textbox, type “Title” then the name of your table. Use underscores instead of spaces.
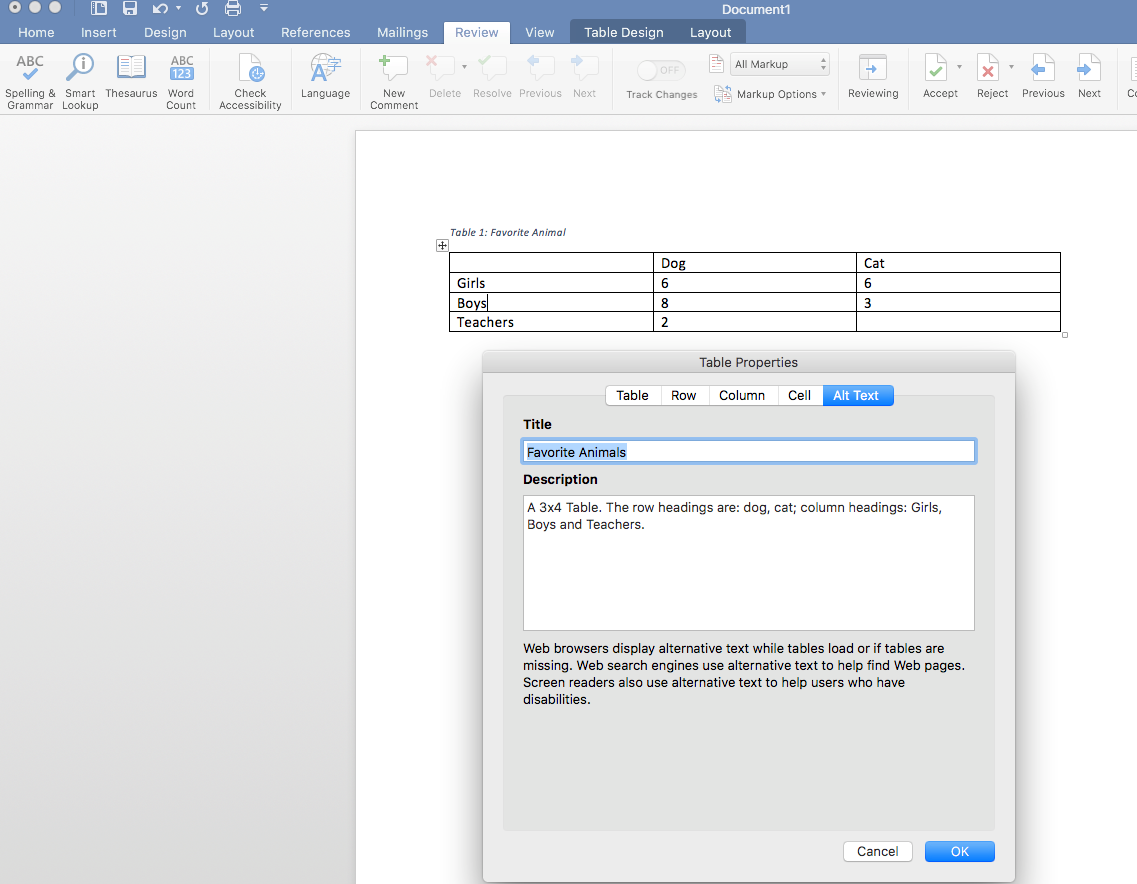
8. Add Alt Tag description to Table
- Right click on the Table and select Table Properties.
- In the popup window, select Alt Text.
- Type in a description of your table.
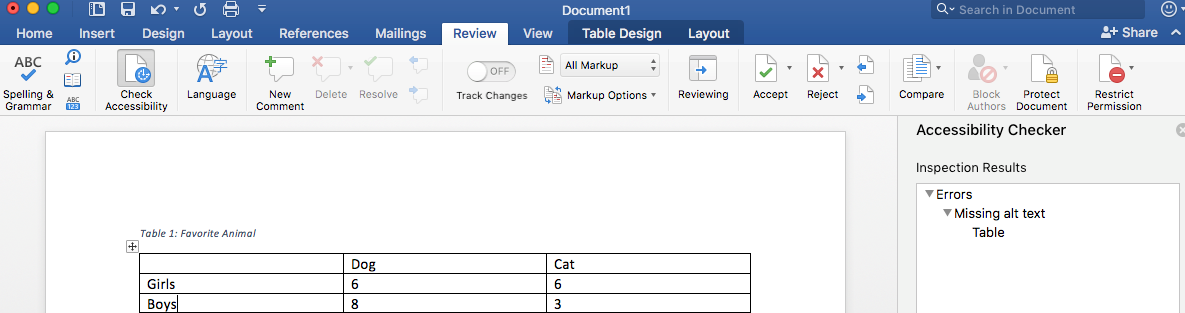
9. Use the Word Accessibility Checker to check for accessibility.
- In the Ribbon, select the Review Tab, then select Check Accessibility.
- The Accessibility Checker will appear on the right side of the screen with the inspection results. If there are accessibility issues, the errors will be listed.
10. Things you should NOT do:
- Do not create your table using the Draw Table Tool.
- Do not create page layouts with tables.
- Do not merge or split cells.
- Do not control spacing in your table with blank rows or columns. Adjust line spacing instead.
Contact us


Explore

Undergraduate
Postgraduate
Policy
-
Follow us on Social media
-


